Physical Address
304 North Cardinal St.
Dorchester Center, MA 02124
Physical Address
304 North Cardinal St.
Dorchester Center, MA 02124

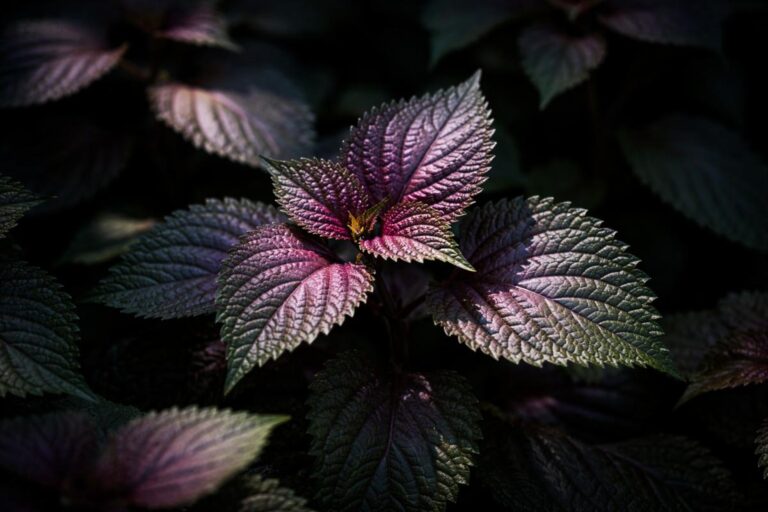
Somewhere along the way, growing food became complicated. We started believing it required land, raised beds, a greenhouse, a composting system, a PhD in horticulture, or at the very least a sprawling backyard and a lot of free time. The truth is quieter and far more accessible than that. It starts with one pot. One container, one seed, one small act of reconnection with the earth. That is all it takes to begin.
Somewhere along the way, growing food became complicated. We started believing it required land, raised beds, a greenhouse, a composting system, a PhD in horticulture, or at the very least a sprawling backyard and a lot of free time. The truth is quieter and far more accessible than that. It starts with one pot. One container, one seed, one small act of reconnection with the earth. That is all it takes to begin.
This article is for the apartment dweller with a sunny balcony rail. For the suburban renter with a concrete stoop. For the person who has always said “I’d love to grow my own food someday” and never quite started. Someday is now, and all you need is one pot.
The gardening industry, bless its heart, has a way of making beginners feel like they need to buy a lot of things before they can grow anything. Raised bed kits. Drip irrigation systems. pH meters. Grow lights. Specialty fertilizers. Premium seed starter trays with humidity domes. The list can run to hundreds of dollars before a single seed hits the soil.
None of that is necessary to begin. For thousands of years, people grew food in clay pots, in wooden crates, in whatever vessel held soil and drained water. The plant does not know what kind of container it lives in. It only knows light, water, and nutrients. Everything else is marketing.
The overwhelm many beginners feel is not a reflection of complexity. It is a reflection of how disconnected we have become from something that is, at its core, one of the most natural human activities there is. Once you strip away the noise and just start, you will wonder why it took you so long.
In recent years, a quiet but significant shift has been happening. More and more people are thinking seriously about where their food comes from. Supply chain disruptions brought grocery store shelves into sharp focus. Rising food prices have made the cost of eating well feel like a luxury rather than a right. And a growing number of people are questioning whether handing total control of their food supply to a handful of corporations is really the wisest long-term strategy.
Growing even a small portion of your own food is an act of reclaiming something. It is not about becoming fully self-sufficient overnight. It is about reducing dependency, even slightly. It is about knowing that the herbs in your pasta sauce came from your windowsill, not a factory farm. It is about the satisfaction, which is genuinely profound, of eating something you grew yourself.
There is also a psychological dimension that is hard to describe until you have experienced it. When you tend a living plant, when you watch something grow in response to your attention and care, something shifts inside you. You slow down. You notice more. You feel a thread of connection to natural cycles that most modern life actively severs. For anyone walking a path of conscious living, that reconnection is not a side benefit. It is the whole point.
Your container does not need to be purchased from a garden center. Some of the most productive edible plants are grown in the most humble vessels. Here is what actually matters:
Size is the primary consideration. Most edible plants need at least 6 to 8 inches of depth for their roots. Leafy greens like lettuce or spinach can do well in shallower containers. Tomatoes and peppers need depth, ideally 12 inches or more. If you are unsure what you want to grow yet, aim for a container that is at least 10 to 12 inches deep and 12 inches wide. That gives you flexibility.
Drainage is non-negotiable. Roots sitting in waterlogged soil will rot. Whatever container you use, make sure it has holes in the bottom, or you can make them yourself with a drill. Elevating the pot slightly on a few stones or a plant stand helps water drain freely.
As for the container itself, consider what you already have. A five-gallon bucket from a hardware store costs around three dollars and is ideal for tomatoes or peppers. An old colander lined with burlap works beautifully for herbs or lettuce. Wooden wine crates, old coolers with drainage holes punched in, even large tin cans for herbs on a windowsill. Fabric grow bags, which you can find online for just a few dollars, are an excellent option too since they encourage healthy root development and are collapsible for storage.
The only container to avoid is anything that previously held chemicals or toxic materials. Beyond that, your creativity is the only limit.
The best plant to grow in your first pot is the one you will actually eat. That sounds obvious but it matters. If you never cook with fresh basil, growing basil will not feel rewarding. If you eat cherry tomatoes by the handful, growing a tomato plant will feel like a revelation.
That said, here are the best single-pot starters for most beginners:
Cherry tomatoes are one of the most satisfying first grows. A single plant in a large bucket, staked against a wall or fence for support, can produce dozens of tomatoes over a season. They are vigorous, forgiving, and the payoff is enormous relative to the investment.
Herbs are the highest-value grow for limited space. A single pot of mixed herbs, basil, chives, parsley, and thyme together, can save you $30 or more over a summer compared to buying them packaged at the store. They require very little space, minimal care, and grow prolifically in a sunny spot. Mint is worth growing in its own dedicated pot since it spreads aggressively and will crowd out other plants if given the chance.
Lettuce and salad greens are ideal for beginners who want fast results. Many varieties are ready to harvest in as little as four to six weeks. Plant a cut-and-come-again variety, snip the outer leaves as you need them, and the plant keeps growing. One medium pot of mixed salad greens can supply fresh salads for weeks.
Chillies are an excellent choice for anyone who loves spice in their cooking. The plants stay compact, tolerate some neglect, and produce a surprisingly generous yield from a single container. They also thrive in heat, making them well-suited to sunny windowsills and balconies.
Spring onions are perhaps the easiest of all. They grow fast, take up almost no space, and you can even regrow them indefinitely by placing the root ends in a glass of water on your windowsill. If you want a win in the first week, start here.
There are really only three variables that determine whether your pot garden thrives or struggles, and none of them are complicated.
Soil: Do not use soil scooped from your yard or garden. It is too dense for containers, compacts quickly, and often carries pests or disease. Instead, use a basic potting mix from any hardware or garden store. A bag large enough to fill several containers typically costs between five and ten dollars. You do not need anything premium or specially formulated. Standard potting mix is designed to drain well in containers while retaining enough moisture for roots. That is all you need.
Sun: Most vegetables and herbs need six to eight hours of direct sunlight per day to thrive. Before you buy anything, spend a day observing where the sun hits your space. A south or west-facing windowsill, balcony, or doorstep is usually ideal. If you are genuinely low on natural light, leafy greens and herbs are your best bet since they tolerate partial shade better than fruiting plants like tomatoes.
Water: The most common mistake beginners make is overwatering. More potted plants die from too much water than too little. The simplest method to check whether your plant needs water is the finger test: push your finger an inch into the soil. If it feels damp, wait. If it feels dry, water thoroughly until it drains from the bottom. For most plants in most climates, this means watering every one to three days in warm weather, less often in cooler months.
Here is where something unexpected happens. Once you have your pot, your soil, your plant, and you begin the simple daily practice of checking in on it, something shifts.
You start noticing things. The way a new leaf unfurls overnight. The way the plant leans toward the light. The way the soil smells after you water it, rich and alive. These are tiny things, easy to dismiss, but they accumulate into something meaningful. Tending a plant, even one pot, grounds you in the present moment in a way that is rare in the constant scroll of modern life.
Many people who begin container gardening describe it as meditative, not because they set out to make it a practice, but because it naturally becomes one. There is only ever the plant in front of you, what it needs today, and what you can observe right now. The past and future fall away. That is presence. That is mindfulness. And it does not require a meditation cushion or a timer.
There is also something worth sitting with in the deeper symbolism of the seed. You plant something small, something that contains within it the full blueprint of what it will become. You tend it without forcing it. You provide the conditions and then you trust the process. The seed does not need to be convinced to grow. It grows because that is its nature. In many ways, conscious inner growth works the same way. The tending is our part. The unfolding happens on its own schedule.
Caring for your one pot can become a daily anchor. A few minutes each morning checking in, observing, adjusting. It is an act of presence that costs nothing and returns something difficult to quantify.
Something quietly wonderful happens after your first successful grow. You eat a tomato from your own plant, or you snip fresh basil into a dish for the first time, and you feel it: the quiet pull toward more.
This is the natural progression, and it does not have to be planned or forced. You add a second pot because you enjoyed the first. Then maybe a third, planted with something different, something you are curious about. Before long, you have a small collection of containers producing food you actually eat, and the feeling of dependency on the grocery store has quietly loosened its grip, just a little.
The key is to let it unfold organically. Expanding your container garden should feel like a natural response to success, not a project to manage. Each plant teaches you something. Some will thrive. Some will struggle. That is not failure, it is the curriculum. Every gardener, from beginner to expert, loses plants. The learning is in the tending, not in perfection.
As you grow more confident, you might explore vertical space, trellises, wall planters, or stacking systems. You might start seeds from scratch instead of buying seedlings. You might begin composting kitchen scraps to enrich your soil. All of that is available to you, when you are ready. But none of it is required to start.
The most important thing to understand before you begin is this: you do not need to know anything to start growing food. The knowledge comes from doing it, from watching, from making small adjustments, from the plant itself teaching you what it needs. You are not required to be an expert. You are only required to show up.
There is something deeply empowering about growing even a small amount of your own food. It changes your relationship with eating. It changes your relationship with the natural world. And quietly, gently, it changes your relationship with yourself. You become someone who tends living things. Someone who participates in the cycle of growth rather than simply consuming the end result.
In a world that often feels overwhelming in its scale and complexity, the one-pot garden is a radical act of simplicity. It says: I am going back to basics. I am learning to provide for myself, in some small way. I am paying attention to what grows and what needs tending.
Find one pot. Fill it with soil. Plant one seed. Water it. Watch what happens. That is all that is being asked of you right now. The rest will come.
Cherry tomatoes are the perfect first pot grow. They are forgiving, fast-rewarding, and one plant can produce more fruit than you expect. Here is exactly how to do it, from nothing to harvest.
Step 1: Choose Your Container
You need a container that is at least 12 inches deep and 12 inches wide. A five-gallon bucket is ideal and costs around three dollars at any hardware store. Drill four to six holes in the bottom for drainage if it does not already have them. Larger is always better with tomatoes, so if you have a bigger container available, use it.
Step 2: Get Your Soil and Plant
Fill your container with standard potting mix to about two inches from the top. Do not use garden soil. Visit your local nursery or garden center and pick up a cherry tomato seedling rather than starting from seed if you want the fastest results. Look for a compact or patio variety such as Sungold, Sweet 100, or Tumbling Tom, which are well-suited to container growing. If you prefer to start from seed, sow two seeds half an inch deep in the center of the pot and thin to the strongest seedling once both have sprouted.
Step 3: Find Your Sunniest Spot
Tomatoes need a minimum of six hours of direct sunlight per day, and eight is better. Place your container in the sunniest spot you have, a south-facing balcony, a doorstep, a rooftop, or the sunniest windowsill if you are growing indoors. If your plant does not get enough light it will grow tall and spindly and produce little fruit. Sun is the single most important variable for tomatoes.
Step 4: Set Up a Simple Support
Even compact cherry tomato varieties benefit from support as they grow. Push a bamboo stake or a wooden dowel into the soil near the base of the plant. As the plant grows, loosely tie the main stem to the stake every few inches using soft twine or strips of old fabric. Do not tie tightly. The goal is to guide the plant upward, not constrain it. If you have a wall, fence, or railing nearby, you can also train the plant to grow along it.
Step 5: Water Consistently
Container tomatoes dry out faster than plants in the ground, especially in warm weather. Check the soil daily by pushing your finger an inch into the mix. Water thoroughly when the top inch feels dry, until water runs freely from the drainage holes. In peak summer heat you may need to water every day. Inconsistent watering, swinging between very dry and very wet, causes a common problem called blossom end rot and can split the fruit. Steady and consistent is the goal.
Step 6: Feed Every Two Weeks
Potting mix is relatively low in nutrients and container plants cannot draw from surrounding soil the way garden plants can. Once your plant has been in the pot for about three weeks and shows strong growth, begin feeding it every two weeks with a basic liquid tomato fertilizer, available at any garden center. A high-potassium feed is ideal once flowers appear, as potassium supports fruit development. This is the one small ongoing cost, but a single bottle of fertilizer will last the entire season.
Step 7: Pinch Out the Suckers (Optional but Helpful)
Suckers are the small shoots that grow in the angle between the main stem and a side branch. Left unchecked, they grow into full branches and the plant puts energy into foliage instead of fruit. Pinch them off with your fingers when they are small, about an inch long. This is not mandatory, and many beginner growers skip it entirely, but it does direct more energy into producing tomatoes rather than leaves.
Step 8: Watch for Flowers and Fruit
Within a few weeks of planting you will see small yellow flowers appear. These are the precursors to your fruit. If you are growing indoors or in a spot with no wind or bees, gently shake the plant or brush the flowers lightly with your finger every couple of days to help with pollination. Outdoors this happens naturally. After the flowers drop, tiny green tomatoes will appear in their place. Watch them grow.
Step 9: Harvest When Ready
Cherry tomatoes are ready to harvest when they are fully colored, deep red, orange, or yellow depending on the variety, and come away from the stem with the lightest tug. Do not wait for them to be perfectly soft. Pick them as they ripen rather than letting them pile up on the vine. Regular harvesting actually signals the plant to keep producing. From first flower to first fruit is typically three to five weeks, and once a plant starts producing it usually keeps going for months.
Step 10: Enjoy and Reflect
Eat the first tomato straight from the plant before you even take it inside. There is a reason people who grow their own food describe store-bought tomatoes as a pale imitation. The flavor of a sun-warmed cherry tomato picked at peak ripeness from a plant you grew yourself is genuinely something else. Let that moment land. You grew food. From a pot. It was not complicated. And now you know you can do it again.